Burlap Pumpkins
It’s suppose to be 95 degrees today, but with tomorrow being the 1st official day of FALL I won’t let heat keep me from sharing these cute & oh-so-easy burlap pumpkins. I have fallen in love with burlap as I’ve seen all sorts of wonderful burlap creations in blog-land… so I thought I’d try to create a burlap pumpkin & I think they turned out pretty-darn cute. I searched the web and saw how others had made pumpkins & just pulled the advice together to create what I did. I’ve made 2 pumpkins so far ~ the little one I showed last week next to my twine’ified lampshade and a larger one that I’ll show you in a sec.

This small pumpkin next to my twine ball was made using a dinner plate as a template. Here you can see where I laid the plate out on the burlap. Then I just traced with a pencil. I discovered you have to push pretty hard to see the pencil line.

Cut out your circle of burlap. Then I took nylon fishing line and threaded a big needle with it. Then you just start sewing the nylon all around the edge of the circle. I spaced my stitches about 1 inch apart. As you sew & pull the material will start to gather. Here’s a pic that will hopefully help to fill in the gaps of my explanation…

As you get close to finishing around the circle you need to stuff your pumpkin. In my small pumpkin I used some of my son’s holey socks. My large pumpkin I used a old dish towel & some paper towels… so anything pliable will do. Then finish the stitching till you get back to where you started. For my stem I just cut a branch from a backyard tree. My big pumpkin has 4 small stems (all my trees as still small) wound together. I put the stem in the middle & then just started to stitch back-and-forth to gather the material snug around the stems.

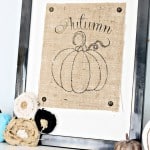
So here’s my large one. The big pumpkin I just free-handed a large circle on the burlap to cut out.

And a close-up of the burlap beauty…

So what do you think? Hope you have a happy 1st day of Fall tomorrow & hopefully the weather here in So. Cal will catch on soon.

Thanks for linking up. I forgot about these when I was making this post. I'm glad the burlap attached!
Hello! I made something similar last year with fabric but the burlap is too cute! Happy fall!
Hello Maryann – it's nice to meet you! Lovin' your burlap pumpkin! Clever idea. Thank you for sharing!
Blessings,
Marie
https://emmacallsmemama.com
burlap for pumpkins. Brilliant. looks so nice!
I'm soooo glad that I found you…I just loooove anything to do with burlap…I have always liked this stuff…sooooo glad it's a hottie right now! Your pumpkins are really neat…might need to make me some. Happy Fall!
Blessings,
Linda
Cute idea and very fall.
Precious idea!
So cute! I love a good Pumpkin decoration!Thanks for joining in on the Fall fun!!!
CUTE! I saw this same thing in a magazine w/some fuzzy orange fabric. The burlap is super cute!
AHHH!!!! I love them! And they would match my burlap window treatment and burlap pictures….ooohhhh…
Thanks for the great idea!
So cute! I love the burlap.
Ah! how cute….I love it!
I absolutely love this idea! Visiting from ASPTL. Great idea, might have to whip up a few of these. Thanks for sharing! -Kelsee
Pumpkinpiecrafts.blogspot.com
oh that is so cute! great job!
This is adorable. I too love burlap and made some curtains this summer out of it and they turned out great. Your pumpkins are so sweet. You did a great job!
Blessings,
Debbie
Oh my gosh, how cute! I just love how burlap is turning up everywhere, this is a great project, thanks for sharing.
i love burlap & it looks so fall-ish! great job.
i host a goodwill party every wednesday, stop by and link up!
Too cute – and burlap is so "in" right now.
Love it! Easy peasy and quick
very cute! i make something similar actually, there is a tute for it on my blog http://www.mylittlecreativeoutlet.blogspot.com. hope you come on over and see how i do mine. i LOVE the burlap! I may have to try that too!