How to… Corn Husk Pumpkins
Of course I wasn’t going to leave you hanging with the how to of making my corn husk pumpkins!

On my first round of making these I created something that resembled a corn husk garlic…

not what I was going for!
{Step 1}
Soak your corn husks in some warm water for about 2 minutes. Remove and let them dry on a towel for about 15 minutes, blotting the extra moisture off. If your corn husks are really wide you might want to tear them in half.
{Step 2}
With your trusty glue gun you want to glue 4 husk pieces into an “t” shape. You are doing this right after the 15 minutes of drying…. you want them to be a little damp so they are still pliable.

{Step 3}
Then glue down 4 more on the diagonal.

{Step 4}
Next… the secret to getting that pumpkin shape… a balloon.
My garlic shape up top didn’t have a balloon inside.
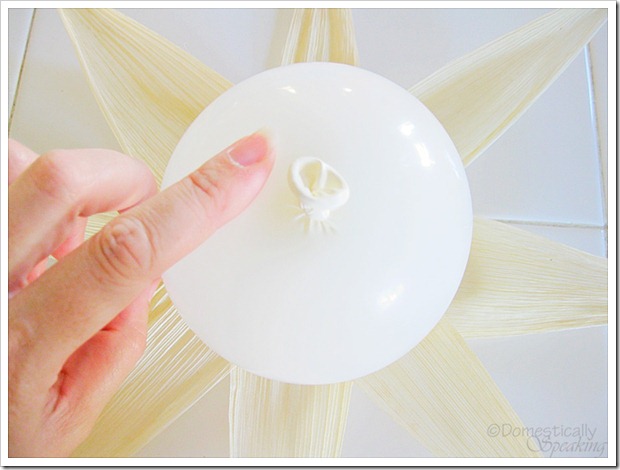
Now you need to test your balloon size by pulling up a few pieces of the husks to make sure that you have enough space to gather the tips of the husks at the top and tie it off with your twine.
I pulled up the corn husk pieces starting with the finally piece I glued down and working my way back down to the first piece I glued. So working top to bottom.
{Step 5}
Tie off the top with some twine and wait for the corn husks to dry completely. I would wait at least 6 hours or overnight to be safe.

{Step 6}
Once the husks are completely dry you can pop the balloon.
Then you have your cute corn husk pumpkins!

I’m sharing my tute at the WONDERFUL parties in my PARTIES menu bar!

Now that is cute and clever Maryann! Thanks for sharing.
Very clever! Love the idea of incorporating corn husk which is so prevalant in autumn!
So cool! I love it when I see real creative instinct.
I see fresh corn for dinner in our future…
Okay, really? This is SO clever! I love it!
Visiting via the Weekend Wrap Up. This is a wonderful idea. When I saw the photo, I had no idea it was a husk covered balloon, ingenious!
So stinking cute.. were new to your blog and love it
Oh geez! These are so stinkin' CUTE! I'm definitely going to make these! I would love if you would share this at my link party at http://www.betweenuandme.com. 🙂
LOVE this. So original and so cute and even my boys can help me make some!