DIY Summertime Serving Station
This post is sponsored by The Home Depot. See full disclosure below regarding DIH Workshop.*
Happy Monday! This year I’m partnering with Home Depot working with them on their DIH ( Do it Herself) Workshop… which I’m SO excited about!!! Well friends… this is the week! This Thursday is this month’s DIH Workshop and your local Home Depot will be showing you how to make your own Serving Station.
Here’s my version of this fun project!

This is a great project will so many options to customize it.
Here’s how I made it:
Tools:
- Circular saw
- Level
- Drill with driving bits
- Safety goggles
- Tape measure
- Pencil
- A nailer and one-and-a-quarter inch nails
Materials:
- A two-foot by two-foot, three-quarter-inch project panel
- A ten-foot long one-by-six pine board
- Wood glue
- Paint or stain
- Four 5⁄8 inch screws
- A two-inch hook & eye kit
- A five-foot jack chain and pliers
- A two-pack of three-inch utility hinges
- Four three-inch deck screws
- And two three-inch corner braces 2´x 4´ x 1⁄2˝

Using your circular saw, cut the one-by-six into two 18 3⁄4 inch pieces, two 22 1⁄2 inch pieces, one 171⁄4 inch piece, and one 10 7⁄8 inch piece. Then cut the project panel into a 2-foot by 18-inch rectangle.
Then I used a beautiful blue spray paint and painted all of the pieces of wood before assembling.

Next you need to create a box. Use the 22 1⁄2 inch pieces for the top and bottom and the 18 3⁄4 inch pieces for the sides. Make sure that the top and bottom pieces fit between the side pieces. Use the wood glue to attach the sides and finish attaching with the nailer.
Then it’s time to attach the divider and shelf.

Find the center of the box – 12 inches across the top and bottom – and insert the board that measures 17 ¼ inches. Glue it and nail it in place.
Then repeat with the 10 7⁄8 inch board, inserting it horizontally at the 9 3⁄8 inch mark. Use the wood glue and nailer to attach it.

Now it’s time to attach the the folding top. Put your box upright, and butt the table top up against the bottom. Then pull it back about 1/8th of an inch, so you have a gap to attach the two three-inch utility hinges.
Now your creating a drawbridge. Cut your chain in half.

Attach the chain to the folding top using one of the 5⁄8 inch screws. Attach the other end inside the serving station. Repeat on the other side.

Time to attach the eye hook. Close up the table top, then screw the eye into the side of the table top, and screw the hook into the outside of the box. Measure carefully so that it will close properly.
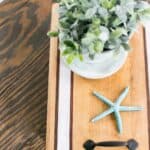
On the top of my tabletop I decided to add a nautical compass image.

I traced over this image firmly with a pencil which left an indentation in the wood.

Then I used a gold metallic paint pen to fill in the traced area.

I also added a rope handle. I just used a drill to make the two holes for the rope and tied off the ends.

This made for the perfect beverage station.


I love the shelf for some cute decor and storage.

Such a great project!!!
So have you signed up yet?
If not it’s super easy to do.

You can click on the image to get to Home Depot’s website to signup at your local store.
Invite some friends to join you! It makes for a great Girl’s Night Out!
If you’re in Southern California… I’ll be at the Home Depot in Burbank.
*The Home Depot partners with bloggers such as me for DIH Workshop program. As part of this program, I received compensation for my time. They did not tell me what to purchase or what to say about any product mentioned in these posts. The Home Depot believes that consumers and bloggers are to form their own opinions and share them in their own words. The Home Depot’s policies align with WOMMA Ethics Code, FTC guidelines and social media engagement recommendations.

So cute! Having just moved into a new coastal style home (and the fact that we are sailors) I am anxious to get decorating and loved all of your rope inspired projects, I especially liked this one and the cloche! I would sure love it if you would stop by and share one or two of these ideas over at my new Sunday link party at Celebrate and Decorate! Happy Summer!
This looks so amazing! Pinned and tweeted! Thanks for being a part of our party. I hope to see you, Monday at 7 pm. Lou Lou Girls
I LOVE this project! I am going to have to get my Luke on this one with me. It would be so perfect for outdoor entertaining. Please come share your blog posts over at the Home Matters Linky Party! We’d love to have you for a visit. The Door is OPEN. https://lifewithlorelai.com/2015/06/25/home-matters-linky-party-43/ 🙂
~Lorelai
Life With Lorelai
this is such a cute idea for summer! I love all the little details!
stop by and chat ♥ https://storybookapothecary.com
The first time I saw this project I immediately think that it will be perfect for breakfast station! I just need to find a suitable corner for it :p Thanks for sharing!