
DIY Industrial Metal Pumpkins
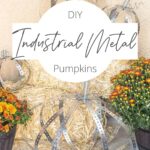
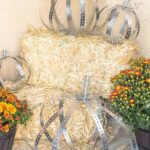


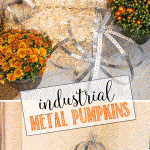

If you’re looking for fall decorations that are a little different from the usual orange pumpkins, I’ve got a fun DIY for you!
These DIY metal pumpkins are made from perforated metal hanger strap, a few screws and nuts, and some inexpensive hardware. The result is a collection of rustic, industrial-style pumpkins that look amazing on a front porch, around a fireplace, or as part of a fall display.
And here’s one of my favorite things about them:
A little rust only makes them better!
So if you’re looking for an unusual fall DIY that can transition from September through Thanksgiving, these industrial metal pumpkins are definitely worth trying.

I love the look of these rustic pumpkins, they are perfect for the outdoors… a little rust will make them even cuter by your front door! These pumpkins are the perfect fall decor craft project.
Why You’ll Love These DIY Metal Pumpkins
I love a fall craft, but I’m especially drawn to projects that don’t look like every other fall decoration.
These metal pumpkins have a rustic industrial look that works beautifully with farmhouse, vintage, cottage, and outdoor fall decor.
Here’s why they’re worth making:
- They’re unique and eye-catching.
- They’re durable enough for outdoor fall decorating.
- You can make them in several different sizes.
- They’re easy to customize.
- A little weathering and rust adds character.
- They’re perfect for a fall porch.
- They work for September, October, Halloween, and Thanksgiving.
- And they can be flattened for easy seasonal storage!

How cute is this little metal pumpkin? Ok here’s what you need to make these cute pumpkins!
What You’ll Need to Make Metal Pumpkins
(affiliate links provided for your convenience):
- Perforated Metal Hanger Straps you can find it here too
- Compression Springs multi pack you can find it here too
- Screws and Nuts
- Hobby Wire or grab it here
- Wire Cutters or Tin Snip
- gloves
How to Make DIY Metal Pumpkins
Step 1: Plan and Cut Metal Strips
Decide how many pumpkins you want and the sizes you want to make them. The metal strips you are cutting will be shaped into a circle, using multiple circles to make each pumpkin. The largest pumpkin we made was with 4-foot metal strips. Then we made two 3 feet and two 2 foot pumpkins also. Once you pick the sizes you want to measure and cut your strips with either metal cutters or tin snips. I’d recommend using gloves as the edges of the metal strip can be sharp.
Tip: for the large 4-foot strip pumpkin we used 5 strips for that size pumpkin, the other sizes we used 4 strips.
Step 2: Assemble the Base
Gather your strips for 1 pumpkin. Grab one of the screws and finding the center of one of the strips, place one of the holes in that center area through the screw. (Bottom of screw on the ground with the thread sticking up for you to place the strips on top of it.)

Step 3: Add Remaining Strips
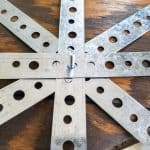
Continue to add your strips, placing a center hole through the screw. Spread out the strips evenly as pictured above.
Step 4: Secure the Base
Once you have your strips evenly spaced, place the nut on the screw and tighten. Don’t overtighten as you may need to adjust it later.
Step 5: Shape the Pumpkin
Now it’s time to gather the ends to the top. Start with the first strip you added to the screw. Bring the 2 ends together and place a screw through the top down through a hole on the ends of each of that strip. Now repeat with the 2nd to last strip. Continue until all the strips are through the screw. Now make sure you have your strips spaced how you want them and add your nut and tighten. You may need to loosen the bottom screw if you can’t get the look you want. Once you’re happy with the placement tighten the top and bottom screw well.

Step 6: Add Rustic Details
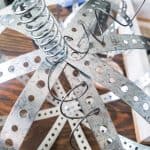
Fun time! I attached a spring to the tops of each of the pumpkin to create the look of a pumpkin stem. As you can see from the photo above I placed the end of the spring through one of the holes. Remember to wear gloves and I found a flat head screwdriver helped to lift the metal strips to get the ends in.
I took a circular metal piece I had and twisted the hobby wire around it to create the metal twines. The twist creates that cute pumpkin vines tendril. Anything round would work – broom handle, wooden dowel, etc. Stretch them out if you need to, to get the look you want then add those to your pumpkins. I did a variety… some pumpkins just had one others two… mix it up.

Decorating with Your Metal Pumpkins
Then you get to have the fun of decorating with them! I think they are perfect for outdoors during September, October, Halloween and even Thanksgiving! Pair them with hay bales or lanterns for a cozy autumn vibe.

Tips for Success
- Safety First: Always wear gloves when handling metal strips.
- Customize Sizes: Mix large and small pumpkins for a dynamic display.
- Embrace Rust: A bit of rust enhances the rustic aesthetic over time.
- Storage: Store indoors during off-seasons to maintain their look. You can press the pumpkins flat and then pull back open when you pull them out of storage.

Such pumpkin cuteness!!! I hope you have a chance to make these Industrial Metal Pumpkins too!
How to Decorate With Metal Pumpkins
Now comes the best part—decorating!
These DIY metal pumpkins are especially fun because they work in so many different fall displays.
Front Porch Fall Decor
Place several pumpkins near your front door with:
- Hay bales
- Lanterns
- Potted mums
- Cornstalks
- Wooden crates
- Baskets
- Other rustic fall decorations
How to Store DIY Metal Pumpkins
Here’s another reason I love this project.
They can be flattened for storage!
When fall is over, simply press the pumpkins down so they take up much less space.
Then when you’re ready to decorate again, pull them back open and reshape them.
That’s a huge win when you’re dealing with seasonal decorations and limited storage space.


Other Fall Projects:
- DIY Twine Pumpkin Sign
- Thrift Store Cable Sweater Pumpkins
- How to Make a Sign: Autumn Leaves and Pumpkins Please



The perforated metal hanger strap is such a clever way to create pumpkin shapes without the usual orange décor. I especially like that a few screws and nuts turn inexpensive hardware into rustic pieces versatile enough for a porch or fireplace display.
This is such an awesome idea maryann! thank you for sharing this to us! will surely do this this coming Halloween, can save more money than buying and carving on actual pumpkins
These are super cute maryann, love the rustic feel of them!
Depending on how much the springs and metal straps are will be making a few of these. . If we were still going to be in craft show at Tractor Supply these would have been great item to make/sell for show. As days went on I realized with my arthritis hands was too hard on me to get items made for sale.
Thanks for sharing how-to.
Happy week
Thank you for sharing the instructions for the pumpkins God bless and thank you
You’re welcome Norma!
I absolutely love these pumpkins!!!!!! Definitely have to make these.Thank you Maryann!
Happy Fall, donna
Thanks Donna – Happy creating!