
DIY Gather Wood Painted Sign
I am proud to be a 3M, Behr®, and Wooster® – sponsored blogger, and, as part of my responsibilities, I get the opportunity to evaluate products. Opinions are my own and additional product used in the project were selected by me.
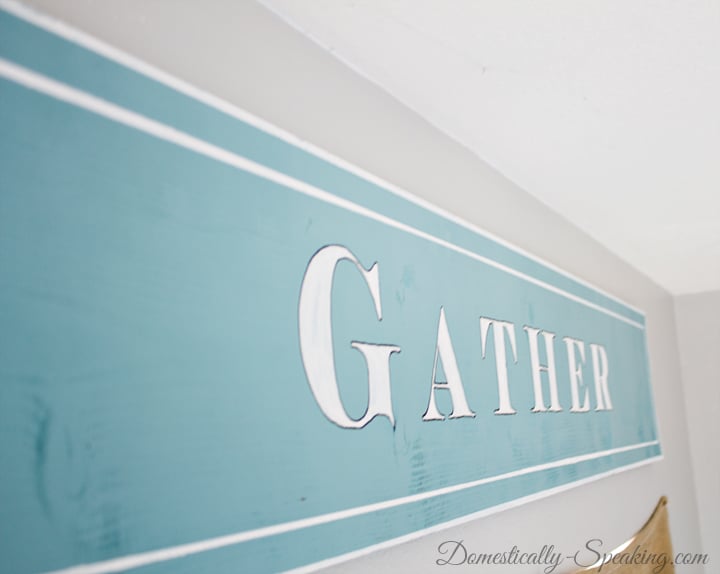
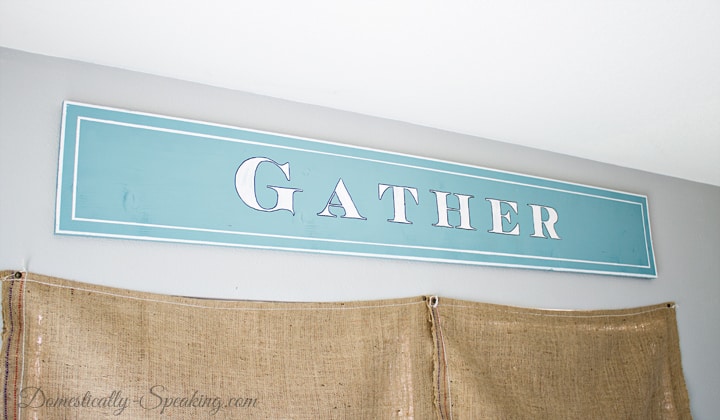
 Hi friends! I’m super excited to share with you guys this fun project. We are still working on our kitchen and dining nook makeover and this DIY “Gather” Wood Painted Sign was the perfect addition to the space we gather and share our meals in.
To create this project I went to The Home Depot and gathered my supplies. Here’s what I used:
11″ x 6′ pine board
ScotchBlue™ Painter’s Tape Multi-Surface with Advanced Edge-Lock™ Paint Line Protector 2093EL
Behr® Paints
Wooster® Brush and Roller
I used the new Marquee™ Paint in Cameo White (MQ3-32) and Schooner (MQ6-7) for this project. LOVE this shade of blue and the quality of the paint was great as well!

I started by using Wooster ® Pro 4 1/2″ x 3/8″ Woven Cage Frame Roller Assembly and gave the whole board a coat of the blue paint.

I let the board dry over night and then I used the ScotchBlue™ Painter’s Tape. I used the .94″ ScotchBlue™ Painter’s Tape Multi Surface with Advanced Edge-Lock™ Paint Line Protector 2093EL tape.

I pressed the tape along the edges firmly and then gave it one coat of the white paint with the Wooster® Pro 1″ Nylon Thin Angled Brush.

I let the paint dry about an hour and then pulled up the tape.
I did leave the inner tape in place so I could use it as a guideline for my letter placement.

I go old school when I paint signs. I picked a font I liked and printed it out in the largest size to fit in my space. I lined it up with the bottom inner tape and then used some more tape to hold each piece of paper in place.
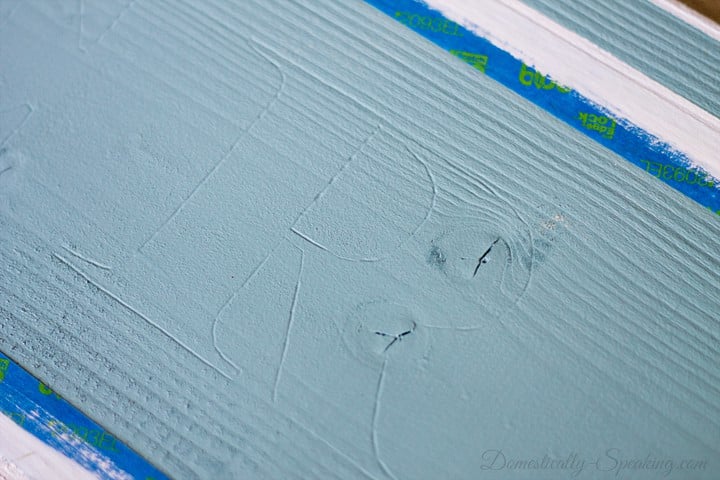
I firmly traced the outline of each letter. The pine board is soft so it made a nice indentation, making painting much easier.
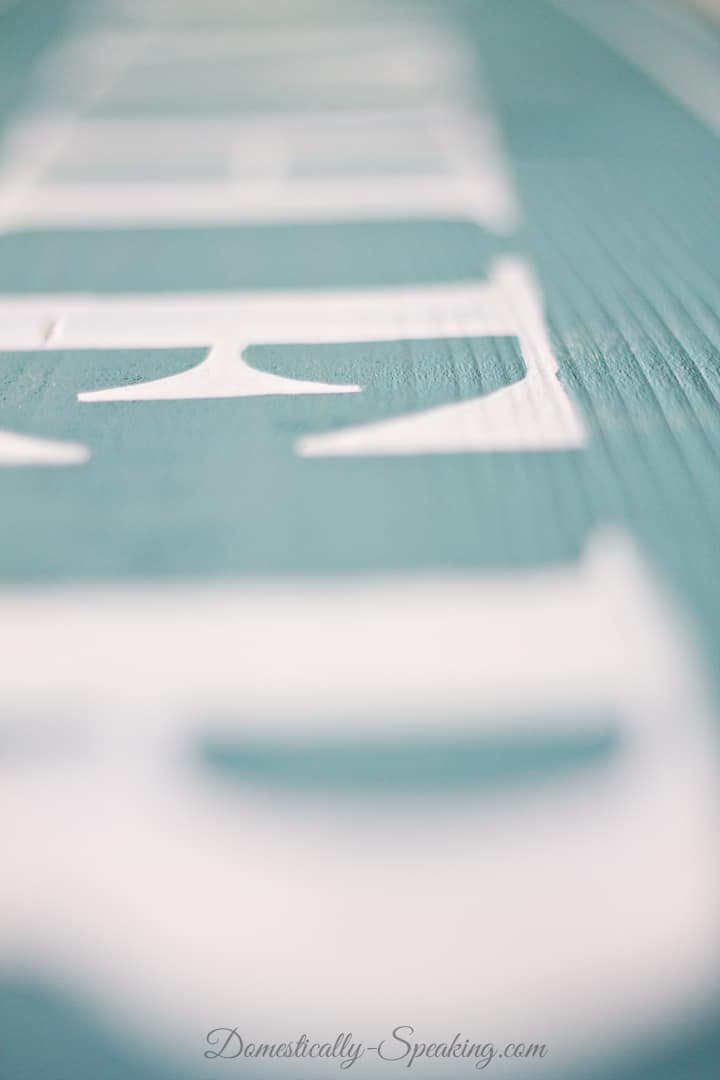
With a small paint brush I filled in each of the letters with the white paint. I let it dry about an hour.

Then with a permanent black marker I went around the outside edges of the white painted letters… I love how it makes them pop.

I love this addition to our family room and it’s perfect just in time for Thanksgiving as we gather with our families.
Making a sign like this takes a little bit of time but it’s not hard at all.

For additional great ideas make sure to check these links out…

ScotchBlue™ Painter’s Tape Facebook
ScotchBlue™ Painter’s Tape Twitter
ScotchBlue™ Painter’s Tape Pinterest

The Home Depot Consumer Program
The Home Depot Facebook
The Home Depot Twitter
The Home Depot Pinterest
Thanks for stopping by friends!


I love how you went old school with the traced-letter approach—it gives the sign an authentic handmade feel that mass-produced decor can’t match. That careful precision reminds me of the patience I need when trying to guess related concepts in Closeword’s daily semantic game. Your blue-and-white color combo is spot-on for a cozy dining nook.
how did you get your font to print so big. My word processor will not go any larger than 72
I love the sign and the colors that you used. Pinned. Lou Lou Girls
How do you stop the paint from transferring onto the permanent marker? When I try to use this technique the paint stops the flow of the marker pen and I end up having to use about 5 just to complete one project.
Wow, cool project! What did you use to trace the letters- just a pencil? I can’t believe it left such a distinct impression in the wood…that is good to know! I’m hosting a linky party on Saturdays at 8 pm starting this weekend and would love to have you link up! It’s at http://www.averystreetdesign.com and is called “Found & Foraged.” Hope to see you there! xo.
That blue is gorgeous! Love it!
So gorgeous!! I love the nice crisp lines the tape gave – no seeping! That roller looks handy too!! I love the font you chose for your sign – pinning!
What a clever way to transfer the letters and get them just right! Your technique is brilliant, and worked perfectly.
What a great project! Love the color of paint you used…so pretty!
This blue is such a great color! And my goodness, you must have steady hands to have been able to outline those letters so beautifully! Love it!
LOVE this sign!!!
This is stunning, Maryann! Stunning!