
DIY Big Farmhouse Shelf


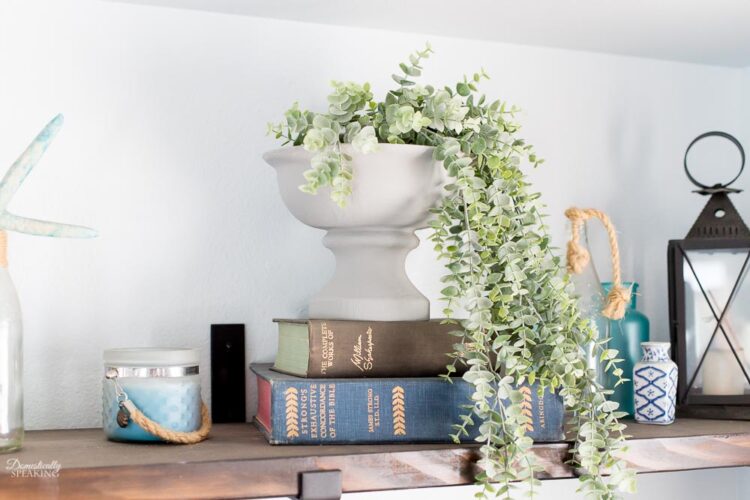
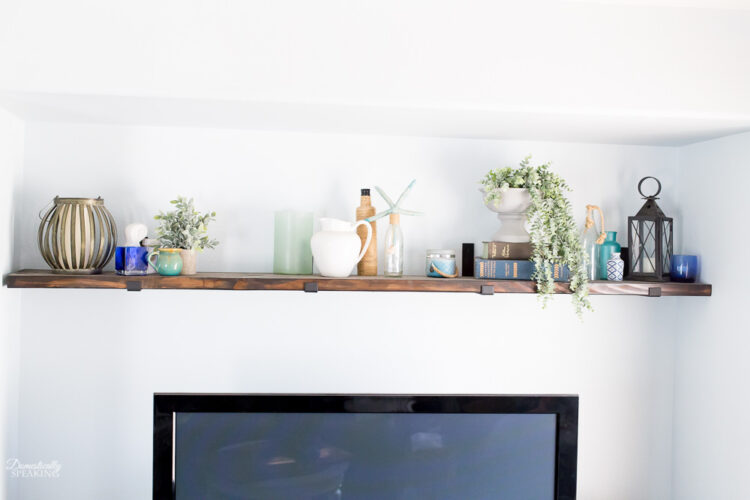
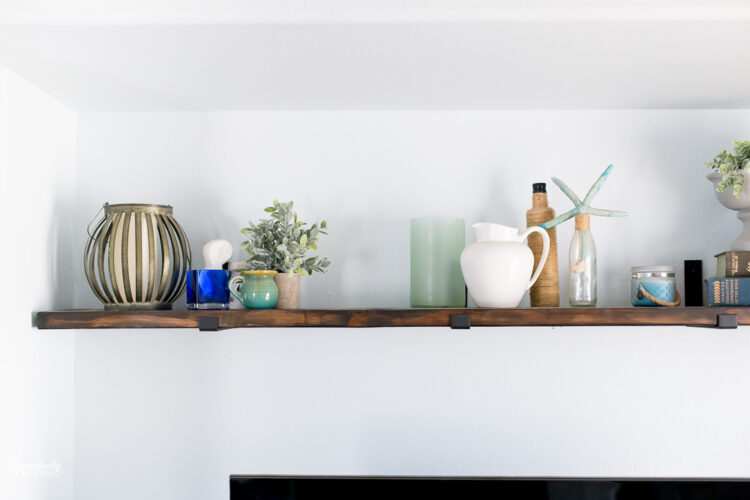
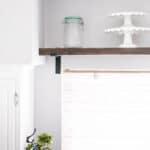
I’m so excited to show you the Big Farmhouse Shelf that I installed in our family room! Our family room has one of those concave media niches that were common in the early 2000’s here in Southern California. We created an entertainment center using IKEA shelves when we first moved in, but I was ready for a change. I love farmhouse shelves! A big solid wood shelf would be the perfect focal point for above our TV. It’s the perfect place to display your home decor pieces with that rustic look.
Supplies Needed for Rustic Shelves
Affiliate links are provided for your convenience.
- pine board for the wall shelf (I used a 2″ thick by 12″ wide from Home Depot for my shelf because I wanted it chunky)
- shelf brackets
- stud finder
- drill/screwdriver
- miter saw
- sand paper / sander
- stain
How to Make a Farmhouse Shelf
To get that farmhouse style I went with a chunky 2-inch thick piece of pine common board. I got one that was 12 inches wide too. I wanted the open shelves to be noticed and having that thick wood helps with that. Measure out the length you need and trim it down with your miter saw. For my space, I made it 1 inch shorter than the width of the space since I wanted the shelf to really fill the space, plus lots of room for decor items.
Then I went over the piece of wood with my sander to make sure it was smooth before staining it. After sanding I always like to use a wet paper towel to get any sawdust off the wood. Give it a few minutes to dry before staining.
I used my favorite Kona stain, which I’ve used on many projects including our DIY Mantel. You can use an old rag or a foam paintbrush to put on the stain. I did one section at a time. Let the stain sit a few minutes and then go back and wipe off the excess, then move to the next section. I let one side of the board dry for a couple of hours before flipping and repeating the process on the other side.
While that second side is drying, you can get the brackets up. I love using these brackets! I used similar ones on my kitchen shelf. The black metal gives it that modern farmhouse look. Make sure to use your stud finder to locate the studs on the wall. The wood is heavy and you want to make sure you mount it safely. My brackets came with directions on how to hang and recommended spacing.
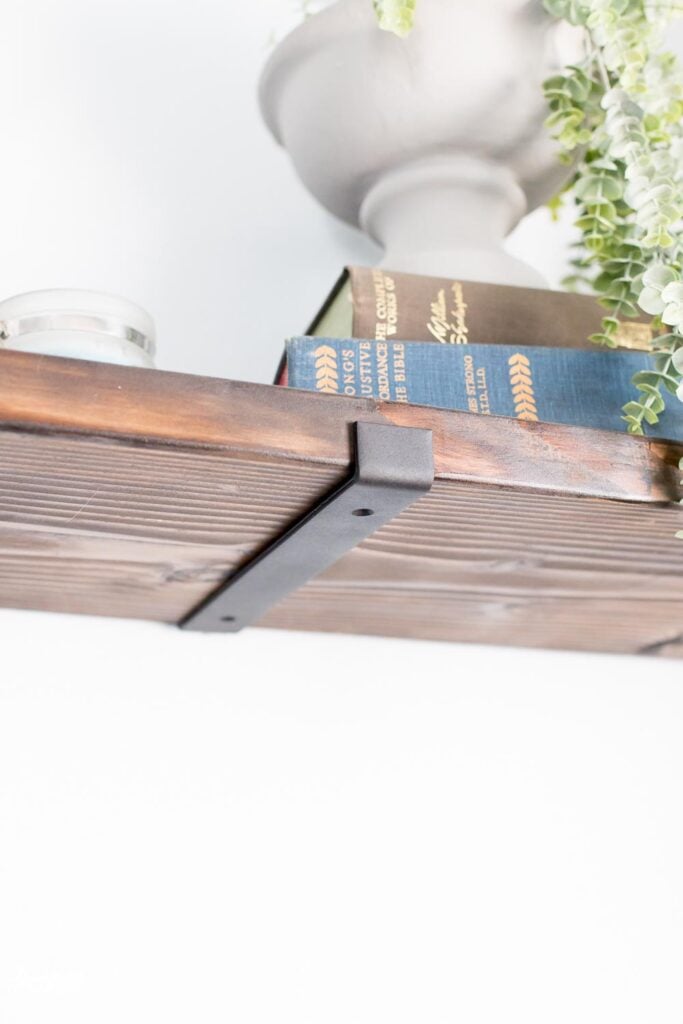
Once you’ve located your studs and figured out your spacing, you can hang the brackets.
After the shelf is completely dry from staining (I let mine dry overnight) you can place it on the brackets. This is an easy project that was the perfect addition to our family room space.
Wooden shelves are a great way to add style and additional storage and decor display in any room.
If you wanted more of a rustic wood you could bang it up with chains and a hammer before staining. Using a torch on the wood would be gorgeous too. Farmhouse shelves are a great addition to your dining room for displaying those extra special bowls and cups, or in the laundry room for storing your detergent and fabric softener. My next plan is to add some in our master bathroom near the bathtub.
I hope you find these farmhouse shelf directions helpful and you can easily modify them for any shelf size you need.


This DIY is amazing. Can’t get any better than this for my farmhouse. Thanks for sharing.
Really appreciate your work. looking forward for more DIYs like this in future from you. Great stuff.
Great idea! your information is very helpful . I am satisfied that you just shared this helpful information with us. Really Appreciated.