
DIY Hobnail Milk Glass Candle
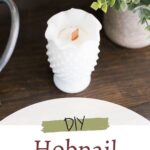
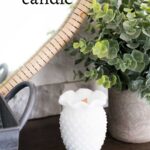



Have you ever spotted something at the thrift store and immediately thought, “I could turn that into something amazing!”?
That’s exactly what happened when I found this little hobnail milk glass vase for just $1.
I already loved the vintage look of the raised hobnail pattern and creamy white milk glass, but then I had an idea: why not turn it into a candle?
A quick look at Anthropologie gave me even more inspiration. They had a beautiful milk glass candle that was selling for $98!
I knew I could create my own version using my $1 thrift store find.
And that’s exactly what I did.
This DIY milk glass candle is an easy thrift store makeover that gives an inexpensive vintage piece a whole new purpose.

Why I Love This Thrift Store DIY
There is something so satisfying about finding an inexpensive thrift store piece and giving it a completely new life.
This project is especially fun because:
- The vase cost me just $1.
- You only need a handful of supplies.
- You can customize the fragrance.
- You can use different types of milk glass.
- It makes beautiful vintage-inspired home decor.
- It’s a fun way to create a unique handmade candle.
- And it looks much more expensive than it actually is!
If you love thrift store decorating, this is definitely a project to keep an eye out for while you’re shopping.
What is Hobnail Milk Glass
Maybe you’ve seen beautiful hobnail glass in your local thrift stores. Hobnail is the raised, dot pattern that you can see on this little vase I found. Vintage milk glass is creamy white glass. I was thrilled to find this gem and then inspiration hit to turn this little vase into a quaint candle. Hobnail milk glass vases have a timeless appeal with their delicate raised dots (hence the name “hobnail”) and milky-white finish. They’re versatile pieces that can complement various decor styles, from vintage to modern farmhouse. Plus, you can often find them at thrift stores for a steal! Here is the one I found.

Anthropologie Inspired
Affiliate links are provided for your convenience.
I was browsing Anthropolgie’s site when I came across this gorgeous candle they are selling for $98! I had this little vintage hobnail milk glass vase in my thrift store stash, so I knew I wanted to create my own inspired version. My vase is about half the size that they are selling, but since I scored my vase for only $1 at my thrift store, I’m making this project for under $5.
DIY Milk Glass Candle Supplies
- Hobnail milk glass vase (check your local thrift stores)
- Candle wax flakes or blocks
- Candle wicks (I used a cracking wood wick)
- Wick holder or pencil (if you use a
- Fragrance oil (optional)
- Double boiler or makeshift setup with a heatproof bowl and pot
- Wooden skewers or chopsticks (for stirring)
- Decorative accents like dried flowers, herbs, or spices (optional)

How to Make a DIY Milk Glass Candle
Prepping your Vase
If your thrift store vase is dirty, give it a good cleaning. I just soaked mine in some soapy water, and then gently used a paper towel to rub it clean. I then let it airdry before moving on to turning it into a beautiful candle.

Prepare Your Workstation:
Set up your double boiler or makeshift wax melting setup. I used an old pie tin, and placed it over a saucepan with about 1 inch of water in the pan. I created a pour spout in my pie tin to make it easier to pour the hot wax. I highly recommend purchasing a candle wax pouring pot if you haven’t done this before or don’t have a steady hand. Make sure to place the hobnail milk glass vase on a heat-resistant surface.

Melt the Wax:
Add your desired amount of candle wax flakes or blocks to the double boiler or heatproof bowl. Heat the wax gently over medium-low heat, stirring occasionally with a wooden skewer or chopstick. I eyeballed how much wax I would need for this little vase, and used about 4 ounces of wax.

Prep the Wick:
While the wax is melting, prepare your candle wick. Cut it to the desired length, leaving a few inches extra to anchor it to the bottom of the vase. Secure the wick to the center of the vase using a wick holder or by wrapping it around a pencil placed across the opening.

The wood wick I used come with an easy clip that you press the wood wick into and then you can place the clip at the base of the vase and it holds upright.

Add Fragrance (Optional):
If you’d like to scent your candle, once the wax is melted, it’s time to add a few drops of fragrance oil or essential oils to the melted wax. Stir gently to distribute the scent evenly. I used some lavender essential oil. I put in about 4 drops. How strong you want is completely up to you.
Pour the Wax:
Once the wax is fully melted, carefully pour it into the hobnail milk glass vase, taking care not to disturb the wick. Fill the vase to your desired level, leaving some space at the top.

Set the Wick:
Allow the wax to cool slightly until a skin forms on the surface. Then, gently adjust the wick to ensure it remains centered in the wax as it solidifies. You can use wooden skewers or chopsticks to hold the wick in place if you are using a regular rope wick.
Customize (Optional):
Get creative and customize your candle further by adding decorative accents like dried flowers, herbs, or spices to the surface of the wax before it fully sets. Press them gently into the wax using a skewer or chopstick.
Final Touches:
Once the wax has cooled and solidified completely, trim the wick to about ¼ inch (6 mm) above the surface of the candle (if using rope wick). This helps ensure a clean and even burn when you light it.

Tips and Tricks:
- If you’re candle sinks, don’t worry. Mine did the same thing. I let it set up over night and the next morning I just added a little more wax on top to fill in the hole and to create a flat top.
- Experiment with different fragrances and decorative accents to create unique candles for different occasions or seasons.
- If you’re using essential oils for scent, be sure to research their proper usage rates to avoid overpowering or irritating fragrances.
- Always supervise candles while they’re burning and keep them away from flammable objects and curious pets or children.
So, the next time you spot a charming hobnail milk glass vase at your local thrift store, snatch it up and give it a new purpose as a stunning candle holder. Happy crafting!!!

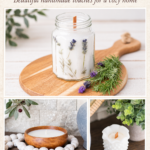
Look for different milk glass pieces
Don’t limit yourself to vases.
When you’re thrifting, keep an eye out for:
- Small milk glass bowls
- Hobnail containers
- Vintage milk glass jars
- Small compotes
- Unusual milk glass vessels





I love the idea of turning a thrift-store hobnail milk glass find into a candle—the textured glass makes it feel vintage even before adding the wax. This would make such a charming centerpiece or handmade gift.
The idea of transforming thrift store finds into something as lovely as a hobnail milk glass candle is so inspiring! I can only imagine how the textured surface will enhance the candlelight, creating a cozy atmosphere in any room. It’s amazing how a simple craft can bring new life to old items. For organizing my DIY projects, I often rely on EmojiMaker to keep my ideas clear and visually appealing.
I love the idea of turning a thrift-store find into a hobnail milk glass candle. The textured glass must make the finished piece look especially charming when the candle is lit.
What a creative way to transform thrift store glass into something stunning! The hobnail texture really does add a lovely touch, enhancing the flickering candlelight in such an inviting manner. I especially appreciate the tips on choosing the right kind of wax for a better burn. I often consult PDFTranslate to help with translating any intricate crafting terms I encounter.
What a fantastic way to repurpose a thrift store find! I love how the hobnail design can create such a warm and inviting glow when the candle is lit. It’s like giving an old piece a new life! I often use StubMath for planning my DIY projects, which really helps keep everything organized.
This is such an inspiring idea! I really like how you mentioned using thrift store finds to create something unique, and the hobnail texture will definitely enhance the candlelight. I’m excited to try making my own version and give a vintage piece new life! I usually track my candle-making progress with MeltCheck, which has been a helpful resource for me.
I love the idea of turning a thrift-store find into a hobnail milk glass candle. The textured finish should make the candlelight glow beautifully, and it’s a clever way to give an old piece a new purpose.
Thanks for putting this together. I’ve been reading around this topic for a while and this helped. Anyway, thanks again.
This is a useful piece. The details are easy to check, which I like. If it’s useful to anyone else, I’ve been following this: https://www.facebook.com/Boda8Official/
I can’t believe that I have never tried candle-making. You have inspired me to give it a try!
This is so pretty Maryann! I love how you turned it into a candle! I have that exact one from my mom, whenever I have roses from the garden I put them in there.
Pinned
Maryann,
Your hobnail milk glass candle is so so cute! I love your tips, but I giggled at that sad pie plate! 🙂
pinned!
gail