
DIY Twine Pumpkin Sign
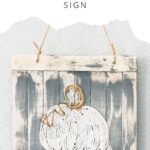
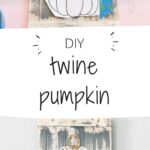
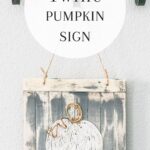
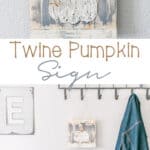

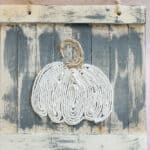
Looking for an easy, budget-friendly fall craft that adds instant rustic charm to your home? This DIY Twine Pumpkin Sign is the perfect project. Using simple supplies like a wood board, natural jute twine, and wood glue, you can create a textured pumpkin that feels warm, neutral, and handmade—ideal for farmhouse, cottage, or modern fall decor.

This small 8×8 sign works beautifully on a mantel, shelf, or as part of a fall vignette, but you can easily scale the idea up for a larger statement piece. Best of all, it doesn’t require advanced crafting skills and comes together quickly.
Why You’ll Love This Twine Pumpkin Sign
- Budget-friendly and uses basic supplies you may already have
- Neutral, natural look that pairs with any fall color palette
- Customizable size and twine color (try classic orange for a bolder pumpkin)
- Great for beginners, kids, or a relaxing weekend project
- Perfect addition to mantel decor, entryway displays, or Thanksgiving tablescapes
Twine Pumpkin Sign Supplies
(affiliate links provided for your convenience)
- wood sign (mine is 8″ x 8″): Select a wooden board of your preferred size to serve as the base for your sign.
- gray paint: Optional for adding extra details or color to your sign.
- paintbrush
- painter’s tape
- natural twine: If you make a larger sign, you’ll need a good amount of twine to create the pumpkin shape. Choose a natural, earthy color like brown or orange to maintain the fall aesthetic.
- jute twine
- wood glue: I found wood glue was easier to use than a hot glue gun, but you can use hot glue if you prefer
- scissors: For cutting the twine to the desired lengths.
How to Make a Twine Pumpkin Sign
Step 1: Prepare the Wooden Board
My sign was already pre-sanded, so I decided to add some dry-brushed gray paint to the surface, just to add some dimension and texture to the surface, and to help the twine “pop” a little.

A sanding block worked perfectly to “rough it up” a little bit, to get the look I wanted.

Step 2: Create the Pumpkin Outline
I took a pumpkin image and cut it out. I used painter’s tape to hold it in place on top of the sign.

With a pen, I traced firmly over the pumpkin lines, so that the indentions would show on the wood.

Step 3: Apply the Twine
I decided to wrap the twine onto each section of the pumpkin. I used a thin paintbrush and brushed on wood glue to one section of the pumpkin. Then I used the natural jute twine to trace the outer edge of that section of the pumpkin and worked my way into the center. Once that section is filled, cut the twine. (A hot glue gun would work but I found it was easier to use the wood glue and it gave you a little more time to get the twine where you want).

Step 4: Define the Pumpkin’s Sections
Repeat for the remainder of the pumpkin sections.

Step 5: Add the Pumpkin’s Stem
Then follow the same procedure with the jute twine to do the stem.

Step 6: Customize Your Sign
You could use any colors you want. A classic orange twine would be adorable too for the pumpkin. For my small sign I used thin twine, but if you wanted to scale this sign bigger you could use a thicker twine.
If desired, paint any additional details, such as leaves, onto the wooden board. You can also use letter stencils or stickers to add a fall-inspired message or greeting to your sign.
Using the twine made for easy hanging.
Tips for Success
- Use thinner twine for smaller signs and thicker rope or jute for larger versions.
- Classic orange twine creates a traditional pumpkin look, while natural tones keep it neutral and versatile.
- This project is forgiving—imperfections only add to the handmade rustic charm.


Other Fall Craft Projects:
- Thrift Store Cable Sweater Pumpkins
- Copper Wire Pumpkin Art
- How to Make a Sign – Autumn Leaves and Pumpkins Please

Check out all the awesome fall ideas below!
Tuesday – Tablescapes
Sand Dollar Lane / Aratari at Home / Nourish and Nestle
JenRon Designs / Salvaged Living / Our Southern Home
Wednesday – Wreaths
Petticoat Junktion / Lora Bloomquist / Exquisitely Unremarkable
Bliss Ranch / The Interior Frugalista / Chatfield Court
Thursday – Crafts & DIY
Domestically Speaking / DIY Beautify
Homeroad / Christina Faye Repurposed
not pictured Weekend Craft
Friday – Porches
The natural jute twine gives this pumpkin sign such lovely texture, and I like that the compact 8×8 size makes it easy to style on a mantel or shelf. It’s a simple, budget-friendly way to add neutral fall charm.
This is such a charming fall craft! Love how simple yet festive it is—perfect for adding a cozy touch to any space. Definitely adding this to my fall DIY list!
This is absolutely adorable. Loving the neutral look of it!
Wow this turned out great and looks like it took alot of patience.
Love that you sanded the wood to give it a rustic look.
Enjoy your weekend
Cindy
Sweet and rustic, my favourite things!
I love the dimension the twine gives your cute pumpkin sign! So cute!
So cute and so creative, Maryann! Love how you used the twine.
Maryann, this is so adorable. I like the dimension that the gray added to the background and the texture of the pumpkins is perfect. Such a creative project. So happy your touring with us!
What a cute pumpkin! Perfect project for fall!
Your twine pumpkin is the best, Maryann! I’m thinking I really need to make one of these! It is so very cute! Thanks for the idea!
Oh Maryann…this little pumpkin is so darn cute! What a fun fall craft…for all ages.
Thanks for sharing your brilliant creativity.
Hugs, Lynn
This is just the cutest Maryann! I love how you applied the twine!
Super cute, super easy! Love it! Pinned.
Thank you so much Lora!
ADORABLE! Love your pumpkin sign and it would look great as a Fall wreath, displayed on a mantel, or hung like a sign. Pinned 🙂
Such a great idea Marie! I might need to add it to a wreath.. hum???
Cute, cute, cute!! I love this and it looks very doable. What a sweet touch for fall.
Thanks Kim – yes, all about easy during the busy fall season!
I love this project, and can totally see myself trying it out for a seasonal piece. Great tutorial as well, I am pinning to my Fall Craft board
Thank you so much Jen!
Very cute! I love white pumpkins and the rustic wood is a great combination!
Me too Susan – LOVE white pumpkins!
This is so cute Maryann! I must do this with my granddaughters, I think they would love it!
Yes, this would be fun with the kiddos!
Maryann! If this isn’t the cutest little thing!!! I could see it going any size and color. It’s just so super clever and so easy….maybe even I could get my craft on! Kudos! Happy Fall… XO
YES! I definitely want to make a larger one with some bigger rope… stay tuned! 😉
Super cute idea and would make a great gift maybe even a gift topper if it wasn’t too big. It would look great anywhere in the house.
Great idea… with those little wood gift tags – that would be so cute!
Too cute! I see those little wooden signs at the craft stores all the time and never have any good ideas with what to do with them. This is a great idea!
Thanks Pam! Always nice when inspiration hits!
Cute, and it can be designed in any size, so if someone wanted to use thick rope and make Charlie Brown’s Giant Pumpkin, they totally could following your tutorial.
YES – it’s on my list Bliss – going for a giant one soon… stay tuned 🙂
This is adorable!!! I want to make one for my home!
Thanks Lindsay!
This is adorable, Maryann! You come up with the best ideas. I can think of so many places that I could use a sign like this.
Thank you so much Paula!