
Gorgeous DIY Faux Stone Fireplace Makeover


Have you ever looked at your fireplace and wished you could give it a whole new look? A fireplace can be one of the biggest focal points in a living room, and updating it can completely change the feel of the space.
We recently gave our family room a makeover with a DIY faux stone fireplace using AirStone, and I couldn’t be happier with how it turned out! The faux stone adds beautiful texture, natural-looking color, and a cozy rustic feel that made such a difference in our room.
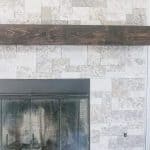
We chose AirStone in Birch Bluff, a blend of browns, grays, and creamy whites that works perfectly with our home’s color palette. We installed the stone from floor to ceiling and paired it with a rustic wood mantel for the finishing touch.
The best part? The stone was relatively easy to work with, and we were able to tackle the installation ourselves. Our project took about a week, working on it for a couple of hours each day.
Let me show you how we transformed our fireplace with this DIY faux stone veneer project!

Materials and Tools for a Faux Stone Fireplace
Affiliate links are provided for your convenience.
We partnered with AirStone for this project, and I loved how the product made it possible to create the look of natural stone without installing full-sized masonry stones.
AirStone is made with recycled material and is designed to be lightweight, making it a practical option for certain DIY stone veneer projects.

Choosing an AirStone Color
AirStone offers several color blends, and choosing the right one is an important part of planning your fireplace makeover.
We selected Birch Bluff, which features a beautiful mix of warm browns, grays, and creamy whites. I loved how the colors complemented our home and gave the fireplace a natural, varied appearance.
Other color options include:
- Autumn Mountain: A warmer blend with rich brown tones.
- Spring Creek: A blend with a variety of gray tones.
Take a look at your flooring, wall colors, furniture, and other finishes before choosing a stone blend. You want the new fireplace to feel connected to the rest of your room.

So let’s get into the install-info! This DIY is great because of it’s ease of installation and you could easily do it in a single weekend.!
How to Install Faux Stone Around a Fireplace
Step 1: Prepare the Wall
Before you begin, make sure the wall is clean and suitable for the stone and adhesive you’re using.
When we removed the existing tile around our fireplace, some of the drywall underneath was damaged. The surface wasn’t perfectly smooth, but we were able to work with it.
The important thing is to follow the manufacturer’s surface-preparation requirements and make sure the wall is sound enough to support the installation. Don’t assume damaged or loose drywall is suitable simply because the stone might cover it.
Step 2: Get Familiar With the Stone Pieces
One thing I liked about AirStone was the variety of pieces available.
There are regular stones, finished-edge pieces for exposed edges, and matching corner pieces for creating a finished corner. The pieces also come in different lengths and two heights: 2 inches and 4 inches.
This variety helps create a more natural-looking stone pattern rather than having every row look exactly the same.
We mixed the sizes and colors as we worked to create the look we wanted. I think that variation is one of the things that makes the finished fireplace look so much like real stone.
You’ll also need to cut some pieces to fit your particular space. We already had a wet saw from a previous backsplash project, so that’s what we used. A hacksaw may also be suitable, depending on the cut and the manufacturer’s instructions.
Use the appropriate tools and protective equipment for your chosen cutting method.
Step 3: Apply the Adhesive
AirStone has an adhesive intended for interior installations. We used a putty knife to spread the adhesive onto the back of each stone.

Think of spreading frosting onto the back of the piece. You want to follow the product’s instructions for the proper adhesive coverage and application.
Once the adhesive was applied, we were ready to position the stone on the wall.

Step 4: Start at the Bottom of the Fireplace
We started at the bottom-left corner of the fireplace and worked our way upward toward the top of the fireplace opening.
As we installed each piece, we varied the lengths and colors. This helped us create a more natural-looking pattern and avoid a repetitive appearance.
Once we finished the left side of the fireplace opening, we moved over to the right side.
Take your time with this part of the project. It’s worth stepping back occasionally to check how the colors and sizes are coming together.

Step 5: Work Across the Top of the Fireplace Opening
When we reached the top of the fireplace opening, we used a level to draw a pencil line showing where the bottom of the stone needed to sit.
We then continued placing the pieces across the opening.
To help keep the stones in position while the adhesive dried, we used boards to stabilize them. This was especially helpful for the pieces installed above the opening.
We allowed the adhesive to dry according to the product’s instructions before moving on.

Step 6: Continue Installing the Stone to the Ceiling
After finishing the area around the fireplace opening, we continued working our way up the wall until we reached the ceiling.
We didn’t finish the entire fireplace in one weekend. Instead, we spent a couple of hours working on it each day, and the complete installation took us about a week.
Working in sections gave us time to position the stones carefully and make sure we were happy with the overall pattern.
If you’re new to installing faux stone veneer, I recommend reviewing AirStone’s installation instructions and videos before you begin. They can be helpful for understanding the process and planning your project.

Our Finished DIY Faux Stone Fireplace
Just look at all that texture and color!
The combination of browns, grays, and creamy whites gives the fireplace a natural stone appearance. Installing the stone from floor to ceiling also created a dramatic focal point in our family room.
I love how much warmth it adds to the space. The stone has a rustic feel without making the room feel dark or heavy, and the variation in color gives it plenty of visual interest.
It was such a satisfying transformation to see the fireplace come together, especially after working on it a little at a time.
If you’re looking for a way to update a plain fireplace and give your living room more character, a faux stone makeover may be worth considering.
Adding a Rustic Wood Fireplace Mantel
We knew we wanted a rustic wood mantel to complete the look of our new stone fireplace.
The combination of natural-looking stone and warm wood creates a cozy, collected look that works beautifully in our family room.
We built our own mantel, and you can see the full tutorial here:
Get all the detail on how we created our DIY Rustic Fireplace Mantel in this link.
One important detail about our installation: we installed the 2×4 mantel mounts before adding the stone, then slid the mantel into place afterward. If you’re planning a similar project, think through the mantel placement and mounting method before installing your stone so you can plan the sequence properly.
Decorating Our Faux Stone Fireplace for Fall
Another thing I love about our new fireplace is how easy it is to decorate for different seasons.
For fall, we added pumpkins and autumn accents to the mantel. The neutral stone provides a beautiful backdrop for seasonal colors, from warm oranges and browns to creamy whites and muted greens.
You could keep the look simple with a few pumpkins and natural elements or create a fuller seasonal display. The stone works with so many decorating styles, so you can change the mantel decor throughout the year without needing to change the fireplace itself.
Is a DIY Faux Stone Fireplace Worth It?
For us, absolutely!
Our fireplace makeover changed the entire feel of our family room. The AirStone added the texture and natural appearance we wanted, and the rustic wood mantel helped complete the look.
Although the project took us about a week working a couple of hours each day, it was manageable to do in stages. We enjoyed seeing the transformation take shape as we worked our way up the fireplace.
Of course, every fireplace is different. Before starting your own project, confirm that the stone product and adhesive are suitable for your wall and fireplace, and follow all manufacturer instructions for installation and heat clearances.
If you’re ready to give your fireplace a fresh look, I hope our DIY faux stone fireplace makeover inspires you!
And don’t forget to check out the DIY Rustic Fireplace Mantel tutorial if you’d like to complete your makeover with a wood mantel.
Happy decorating!




Does this feel like stone or does it feel like foam?
It’s stone. Just a thin piece.
Did you install the mantle over the air stone or place the mantle and put the air stone around it?
Thank you
Hi Shelly,
We put up the 2×4 mounts before the stone, and then slide the mantel on top. You can see some photos in my mantel post here: https://www.domestically-speaking.com/rustic-fireplace-mantel/
What a difference! Great job! We also did a fp makeover about 2 years ago. Know y’all will enjoy!
Can this be used on a wood burning fireplace
Beautiful stones. Perfectly fitted.
Hi MaryAnn this looks great! What was the price point per box? I love the ease of this! It looks great! laura
Hi Laura! Thank you – we love it! Boxes are in the $60 range and we used about 5 1/2 boxes for our fireplace area. The space is about 6 feet wide and 9 feet high.
This is the size of our area as well. How many corner/edge boxes did you need?
Beautiful color you chose!
Thank Holly!