
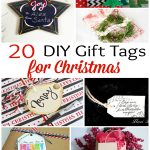
DIY Wood Gift Tags
Hi, there! It’s Cher from Designs by Studio C with another super-easy and inexpensive project… DIY Wood Gift Tags! This project is perfect for the last minute rush and will add a bit of personal flair to holiday packages, plus it is extremely inexpensive! I made two different types of tags, each one with a chalkboard face. Three of the tags have a cork backing and the other three have words created with a woodburning tool.

DIY Wood Gift Tags
Wood Gift Tag Supplies: (affiliate links provided for your convenience)
- 1 – 1/4″ x 3″ x 2′ poplar craft board (actual measurements are 1/4″ x 2-1/2″ x 2′)
- Miter box with handsaw (or power miter saw)
- Drill with 5/32″ drill bit
- 220 grit sandpaper
- Chalkboard paint
- Other assorted paints (I used gold acrylic paint)
- Scrapbooking paper (I used cork)
- Mod Podge
- Woodburning tool with letter plates
- Jute twine
Step One:
Cut the craft board into equal pieces. I cut mine at 3-1/2″ which yielded six tags from a 2′ board. A longer board, of course, will yield more tags. The pieces can be cut with the handsaw or a power miter saw.

Step Two:
Make a mark at the top of each tag 3/4″ in from each side, then make a mark 3/4″ down each side and draw a diagonal line connecting the marks. Cut along the lines with the saw. (This step is completely optional!) Drill a hole in the center of the upper part of the tag (between the dog ears) with the 5/32 drill bit. I stacked the tags and drilled one hole through the entire stack to save a bit of time.


Step Three:
Sand each face of the tags, as well as each edge, with the sandpaper. Apply a coat of chalkboard paint to one face of each tag. The chalkboard paint can also be applied to the edges, as desired. Let the paint dry thoroughly.
The edges of each tag can also be painted a contrasting color – I used gold paint on three of the tags.

Step Four:
For the tags with scrapbooking paper (or cork), apply a coat of Mod Podge to the unfinished face, then apply the paper. Let the Mod Podge dry, then cut away the excess paper.


For the tags with the lettering, add the desired letter plate to the end of the woodburning tool and let it heat up. I do this over a small glass cutting board I bought at the dollar store. (Use caution because the woodburning tool gets extremely hot!) I like to start with the middle letter of each word then work my way out then, at least, my lettering is semi-spaced correctly! I used a few different tips to create a border around the tags.

Step Five:
Season the chalkboard side of the tags by rubbing a piece of chalk over it then wiping it off. Since my handwriting is not that stellar, I used a stencil with a chalk marker to spell out the names on the tags. (The excess chalk around the lettering can be cleaned up with a wet cotton swab.)


Not only are the tags great for packages, but they would also make fabulous ornaments to hang on the tree. They would also be perfect napkin rings or name cards for a dinner party!


I have been making all of my gift tags this year so far. I really love this idea with the wood. So pretty. Thanks for the inspiration and idea!