
DIY Wood Bowl Candle


Turn a simple thrift store wooden bowl into beautiful DIY home decor with this easy wood bowl candle project. With a wooden bowl, candle wax, wicks, and your favorite fragrance, you can create a unique handmade candle with a warm, natural look.
I found this wooden bowl at a thrift store and immediately loved its shape. It was already pretty, but it needed a little cleaning and a new purpose.
Instead of leaving it sitting on a shelf, I decided to turn it into a wood bowl candle.
The natural wood paired with creamy candle wax creates a beautiful look that works especially well with cozy, rustic, farmhouse, vintage, and neutral home decor.
And because every thrift store bowl is a little different, your finished candle will be completely unique.

Why Make a DIY Wood Bowl Candle?
There are so many fun ways to repurpose thrift store finds, and turning a wooden bowl into a candle is one of my favorites.
Here are a few reasons to try this project:
- It’s a great thrift store makeover. Give an inexpensive wooden bowl a completely new purpose.
- Every candle is unique. The shape, color, and character of your bowl become part of the finished decor.
- You can customize the scent. Choose lavender, pumpkin spice, apple cider, cinnamon, eucalyptus, or another candle fragrance you love.
- It’s beautiful home decor. The natural wood gives the candle a warm, collected look.
- It’s a fun handmade gift idea. A finished candle can make a thoughtful homemade gift when made with an appropriate candle-safe vessel.
- You can customize the size. Use different bowls to create candles in a variety of shapes and sizes.
What Kind of Bowl Can You Use?
For this project, I used a wooden bowl I found at a thrift store.
A thrifted bowl is a fun option because you can often find interesting shapes and vintage-looking wood for very little money.
You could also use a wooden bowl you already have at home.
Important: Not every wooden bowl is automatically suitable for use as a burning candle vessel. If you plan to actually burn a candle in the finished project, use a vessel specifically designed and tested for candle use rather than assuming an ordinary thrift-store bowl is safe for an open flame. The National Candle Association recommends a sturdy, heat-resistant candleholder designed for candle use.
If you’re using an ordinary thrift-store bowl as a decorative project, you can enjoy the look without lighting it.

Prepare The Wood Bowl
I removed the sticker and gave the bowl a good cleaning with some vinegar. Then cleaned the vinegar residue with a damp paper towel. Then I used a dry paper towel to dry it completely before moving on to the candle making.
Other Candle Container Ideas
- teacup (see my post here)
- Mason jars
- Candle-safe decorative vessels
- Metal candle containers
- Bowls or dishes specifically designed for candle use
Add The Wick
There are a couple of options you have for adding the wick to your item. They sell glue dots for this but you can also use a hot glue gun, which is what I had on hand and used.
With the size of my wood bowl, I decided to use three wicks. I just eye-balled where they should go, but you can get exact and measure it out. You just need a small amount of hot glue. I put the hot glue directly onto the wood bowl, where I wanted the wick. Then you press the wick base down into the hot glue. The wick can be flimsy, so a trick is to use a plastic straw. Cut a straw so that it is slightly longer than the wick. Slide the straw over the wick and then you can hold onto the plastic straw to press into the glue. Press for 30 seconds to let the glue setup.

Repeat the process for the additional wicks. Remove the straws (if you used them) Then I used long wooden skewers to hold the wicks upright. I put the wick between two skewers and used tape to hold them snug. They also sell wick holders.
Melt Candle Wax In A Pot or Tin On The Stove
I don’t own a wax pitcher, but I’ve used them before and they definitely make the process easier. I used a pie tin that I bent a section, to create a pour spout. You are basically creating a double boiler method.

Fill a pot with a few inches of water, you don’t want the water to touch the tin. If you use a pitch it will submerge into the water, but you only need the bottom few inches in the water.
Depending on the wax you use your directions might be different. The rest of the directions are based on the wax I used.
Turn the burner on your stove to medium heat. Put some wax into either the pitcher or the pie tin. Submerge the pitcher into the water with the handle handing on the side of the pot. Or place the pie tin on top of the pot (you want the pot to be smaller than the pin tin so it can sit on top.
Once the water starts to simmer, turn the temperature down to low. Once the wax melts, remove it from the heat. Check your wax to see if they recommend a set of degrees f to remove the wax.
Add your Scent
One of the fun parts of making candles is picking the scent. There are lots of options but I went for lavender for this candle. Once you remove the wax from the heat, add the fragrance oil. I added 15 drops to my wax. Each scent will typically tell you how many drops based on the amount of wax you are melting.
Give the wax a stir, then it’s time to pour.
Other Candle Scent Ideas
- pumpkin spice
- apple cider
- orange
- cinnamon
- eucalyptus
If you wanted to add a different color than the wax color this would be the time to do it. Follow the direction on the dye for the amount to add.
Pour The Wax Into Your Bowl
Now it’s time to carefully pour the liquid wax into the bowl. With the pouring pot, this process is easier, but you still need to be careful since the wax is HOT. Using a pin tin I put oven mitts on both hands and then carefully pour the wax into the wood bowl. I filled the bowl about 3/4 full. Then let the wax cool to see where the wax would settle. I let it set up for 30 minutes.
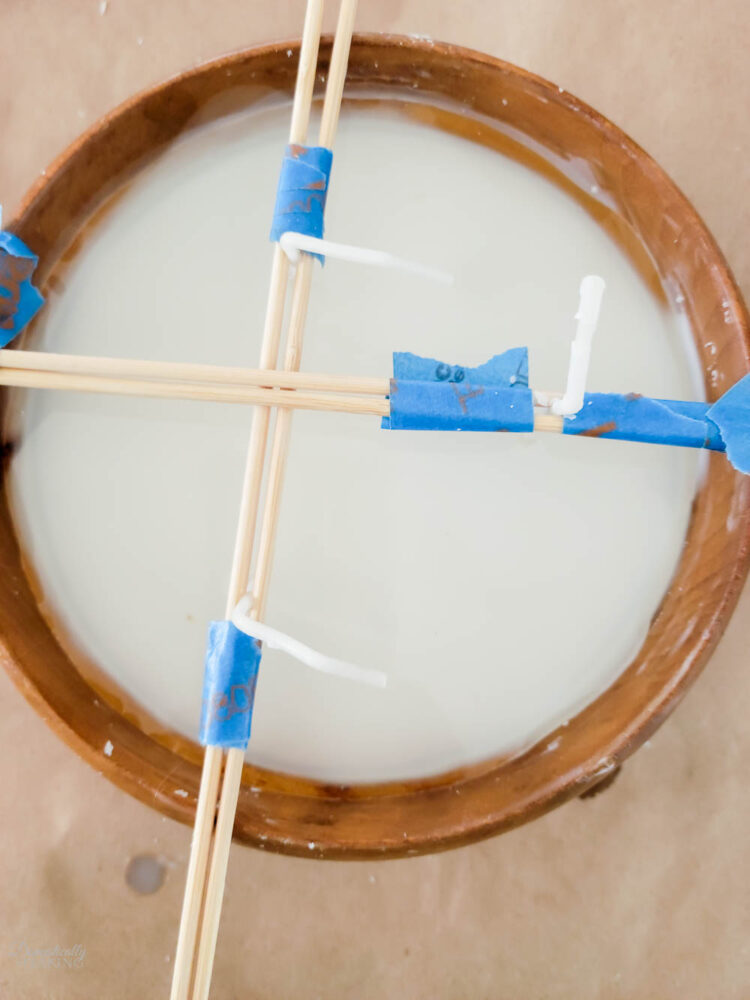
Then I melted a little more wax to top off the candle to the level I wanted. Once the wax melted I repeated the steps above and carefully poured the wax onto the existing dried wax to finish off the candle.

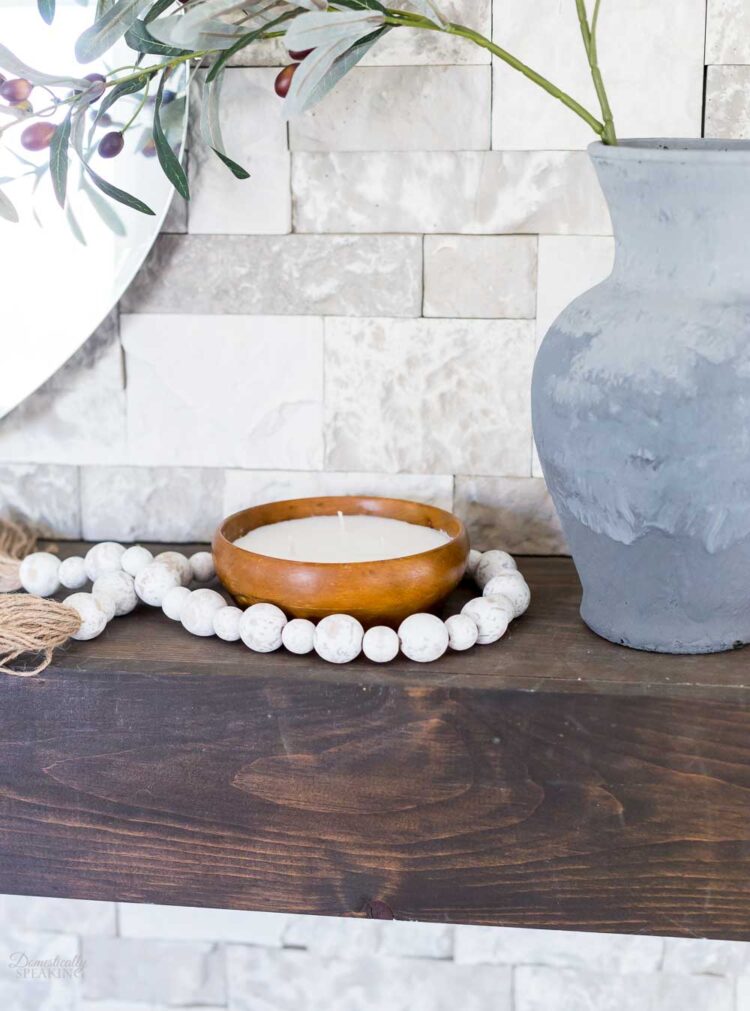
Now it was time to let the candle set up and dry. I let it sit overnight before I removed the wooden skewers and then trim wicks with a sharp scissors.

Creative Ideas for Customizing Your Candle
- Add dried herbs or flowers (like lavender or rose petals) for a decorative touch.
- Experiment with layered wax colors for a unique look.
- Use different bowl shapes or sizes for variety.
- Try different colored waxes
Make a Seasonal Candle
Use the bowl and candle color to create a seasonal centerpiece.
Think:
- Fall candle with pumpkin spice fragrance
- Christmas candle with cinnamon or orange
- Valentine’s Day candle with a soft pink wax
- Spring candle with lavender
- Summer candle with citrus
I hope you found this wood bowl candle instructions helpful. Now check out these other great thrift store makeovers

Baking Soda Paint Thrift Store Makeover
Thrift Store Stacked Boxes Makeover
Shamrock Decor from Vintage Wooden Bowls
How to Paint a Wooden Mirror Frame
Bird Nest Vintage Water Dipper Display
Melamine Serving Tray Makeover
Succulent Terrarium using Embroidery Hoops
A Note About Burning a Candle in a Wooden Bowl
Because this project uses a wooden vessel, I want to emphasize candle safety.
A burning candle is an open flame, and the National Candle Association recommends using a sturdy, heat-resistant holder designed for candle use.
I would not assume that any thrift-store wooden bowl is safe to burn simply because it can be filled with wax.
If your bowl has not been specifically designed and tested as a candle vessel, consider treating your finished project as decorative rather than lighting it.
If you do use a candle vessel designed for burning, follow the wax, wick, vessel, and fragrance manufacturer’s instructions and standard candle-safety practices. Never leave a burning candle unattended, keep it away from anything flammable, and keep it away from children and pets.
Turn Thrift Store Finds Into Beautiful Decor
This project is a great reminder that you don’t need an expensive piece of home decor to create something beautiful.
A simple wooden bowl from the thrift store can become a one-of-a-kind decorative piece with a little creativity.
And that’s what I love most about thrift store DIY projects!
More Thrift Store DIY Projects
If you love turning thrift store finds into beautiful home decor, check out these projects next:




The wood bowl really makes it a great decorative piece.
I was going to make one of these as a gift and my husband was concerned about burning a candle in a wooden bowl. What are your thoughts about that? Thanks,
Flame in a wood bowl ? Doesn’t seem safe.
I really love how this turned out! It reminds me of something that you’d pay big dollars for at World Market or Anthropologie! I need to try to make some candles.
I’m going to be on the hunt for wooden bowls at the thrift store now! Great idea!
Wow, I had no idea you could use a wood bowl for a candle! Great idea Maryann! Pinned 🙂
I love how your candle turned out Maryann! Great tips for doing it yourself. You have me wanting to make one too!
pinned!
gail
That really was the perfect bowl for the candle! I love the pie tin trick, so pretty!
I’ve never made a candle in anything! Thanks for the tips.
I’ve sort of done this before with leftover candles but you really laid out all of the steps. This bowl is too cute. I will be trying this again soon! Great post!