
DIY Easy Modern Mirror Edge


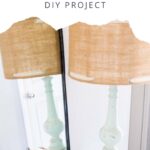






Want to give an old mirror a fresh, modern look without buying an expensive new one? This DIY modern mirror edge is a simple, budget-friendly makeover using self-adhesive weather stripping!
I love a good DIY project that uses an unexpected material in a creative way, and this one is such an easy update. Instead of building a traditional wood frame with mitered corners, I used weather stripping to create a sleek black edge around the mirror.
The best part? You don’t need power tools, complicated cuts, or a big budget. With a measuring tape, scissors, and a little patience, you can give a plain or dated mirror a completely different look in about 30 minutes.
This easy DIY mirror makeover is perfect for a bathroom mirror, a thrift store find, or a decorative mirror that needs a more contemporary style.
Let’s take a look at how I did it!

Why Use Weather Stripping for a DIY Mirror Edge?
When you think of weather stripping, you probably think about sealing gaps around doors and windows—not updating a mirror!
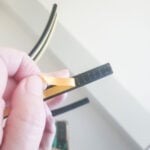
But self-adhesive weather stripping can also create a simple, modern-looking edge around a mirror. I chose a black D-shaped style for this project, which gave the mirror a clean, defined outline.
Here are a few reasons I love this idea:
- Budget-friendly: You can update an existing mirror instead of buying a new one.
- No power tools required: Scissors and a measuring tape are the main tools you’ll need.
- Quick makeover: Once your mirror is ready, the edging can take about 30 minutes to apply.
- Modern style: A black edge creates a sleek, minimalist look.
- Customizable: Choose a different color or paint the weather stripping if you want a different finish.
- Versatile: This idea can work for decorative mirrors, dresser mirrors, and some bathroom mirrors.
It’s a fun alternative to a traditional DIY mirror frame, especially if you want a simpler look without cutting and assembling wood trim.

Materials You’ll Need:
Affiliate links are provided for your convenience.
- Mirror: Choose any mirror you want to upgrade. It can be a full-length mirror, a bathroom mirror, or even a small decorative one.
- Weather Stripping: Opt for a self-adhesive weather stripping tape. It’s available in various styles and colors, allowing you to pick the one that matches your desired modern aesthetic. Here is what I used from Home Depot and one similar from Amazon. The one I chose is a “D” shape. They have flat options too.
- Measuring Tape: For accurate measurements.
- Scissors: To cut the weather stripping to the right size.
- Cleaning Supplies: Clean the mirror thoroughly before starting the project.
- Optional: Paint or spray paint if you want to customize the color of your weather stripping.
How to Remove a Mirror from an Old Frame
For my project, I removed the mirror from its original frame before adding the new edging. If your mirror is already out of its frame, you can skip this section.
First, I flipped the mirror over to locate the screws holding the backing and mirror in place.
I placed it on a stable, protected surface and removed the screws from the back. Once the screws were out, I lifted off the backing.
Then I carefully removed the mirror from the frame and placed it on the counter, ready for the makeover.
Safety tip: Mirrors can be heavy and their edges can be sharp. Wear appropriate protective gloves, support the mirror securely, and get help lifting a large mirror. If it’s mounted to a wall, don’t assume it’s safe to pull it away without checking how it’s secured.


How to Add a Modern Edge to a Mirror
Step 1: Clean Your Mirror
Start by cleaning the mirror thoroughly.
Dirt, dust, fingerprints, and cleaner residue can interfere with the adhesive, so make sure the surface is clean and completely dry before you begin.
This simple step helps give the weather stripping the best chance of adhering properly.
Step 2: Measure and Cut the Weather Stripping
Measure each side of your mirror separately. Even if the mirror looks perfectly square, measuring all four edges helps you get a more accurate fit.
For my mirror, I decided not to make 45-degree miter cuts at the corners.
Instead, I made the top and bottom pieces run the full length of the mirror. The two side pieces were cut to fit between them.
This approach keeps the project simple and eliminates the need for angled cuts.
Take your time with the measurements before cutting. It’s much easier to trim a little off than to discover a piece is too short.
Step 3: Apply the Self-Adhesive Weather Stripping
Once your pieces are cut, you’re ready to apply the weather stripping.
Peel back the adhesive liner and carefully position the first piece along the mirror’s edge. Press it firmly into place, keeping it straight and evenly aligned.
Continue along the remaining edges, working slowly as you go.
One thing to keep in mind: the adhesive is very sticky! Once you press the weather stripping down, repositioning it may be difficult.
I recommend checking the alignment carefully before pressing each section firmly onto the mirror.

Step 4: Trim Excess
After the weather stripping is in place, check each edge for any overhanging material.
I held my scissors flush with the mirror edge to trim the excess from the top and bottom pieces.
For the side pieces, I used my finger to mark where the weather stripping needed to be cut before trimming it.
Use sharp scissors and make small, controlled cuts to get a clean finish.

Step 5: Add a Matching Piece Underneath
Here’s a little extra detail I added to my mirror.
I also placed a piece of weather stripping along the bottom edge where the mirror rests against the dresser.
This helps keep the edge of the mirror from damaging the wood and provides a little extra stability.
It’s a small detail, but it’s one I was glad I included!
How to Customize Your Mirror Edge
I chose black weather stripping because I wanted a sleek, modern look. However, you can experiment with different colors to coordinate with your home decor.
Depending on the style available, you may find white, gray, or other options.
You can also consider painting the weather stripping if you want a specific color.
If you decide to paint it, check that the paint is compatible with the material. Test a small piece first to make sure the finish adheres properly and remains flexible enough for your intended use. Allow it to dry completely before applying it to the mirror.
A few ideas to consider:
- Black: A crisp, modern outline.
- White: A lighter, understated look.
- Gray: A subtle neutral finish.
- A custom color: A way to coordinate with your vanity, dresser, or other decor.
The beauty of this DIY is that you can personalize the look without building an entire frame.sonal touch to your project and allows you to tailor it to your interior design.

The Finished DIY Modern Mirror Edge
And here’s the finished mirror!
I love how a simple strip of weather stripping gives the mirror a cleaner, more modern appearance.
Rather than building a traditional frame with wood and mitered corners, this method creates a defined edge with minimal cutting and assembly.
It’s a great reminder that sometimes the most unexpected materials can be useful for DIY home decor projects.

Tips for the Best Results
Clean the mirror first. A clean, dry surface helps prevent dirt and residue from interfering with the adhesive.
Measure every edge separately. This helps you get a better fit, even if the mirror looks perfectly square.
Plan the corners before cutting. I used full-length top and bottom pieces with the side pieces fitted between them instead of making 45-degree cuts.
Take your time with the adhesive. It’s sticky, so check the alignment before pressing the weather stripping firmly into place.
Trim carefully. Small, controlled cuts help create a neat finish.
Test before painting. If you want a custom color, check paint compatibility with the weather stripping first.
Handle mirrors carefully. If you remove a mirror from its frame, make sure it’s supported on a stable surface and get help with larger pieces.
Easy DIY Mirror Edge

This step-by-step tutorial shows you how to create a modern mirror edge using weather stripping! A crazy easy update to a mirror.
- scissors
- gloves
- weather stripping
Clean Your Mirror: Cleaning your mirror is a vital first step in this project. Any dirt, dust, or residues on the mirror's surface can prevent the weather stripping from sticking the best it can.
Measure and Cut: Take your measuring tape and measure each side of the mirror separately. Mirrors can sometimes have slight variations in length or width. I decided to have the top and bottom run the full length and the sides to fill in the difference.

Apply the Weather Stripping: Begin at one corner of the mirror's edge. Carefully peel off the backing of the weather stripping, revealing the adhesive side. Align the weather stripping with the edge of the mirror and start pressing it firmly in place. Work your way along the edge, keeping it aligned evenly.
Trim Excess: Even with precise measurements, you may find that the weather stripping extends slightly beyond the edge of the mirror. Here's how to trim any excess: Use sharp scissors to trim the weather stripping. Ensure you cut it flush with the edge of the mirror to maintain a sleek and modern look.


More DIY Home Decor Ideas
If you enjoy budget-friendly DIY projects and creative ways to update your home, check out these ideas next:
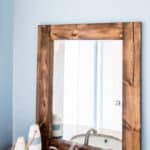
DIY Rustic Bathroom Mirror: Another way to give an ordinary mirror a custom look.
DIY Oval Mirror Frame: A different approach to updating a mirror.
DIY Blanket Ladder: Add practical storage and rustic style to your home.
DIY Bathroom Storage Bench: Create a useful piece of furniture with extra storage.
Final Thoughts
This DIY modern mirror edge is a simple way to give an old mirror a fresh look without building a traditional frame.
With self-adhesive weather stripping, a measuring tape, and scissors, you can create a clean, contemporary edge in about 30 minutes.
I love projects like this because they encourage you to look at everyday materials a little differently. You might already have a mirror at home that could use a quick update!
September Thrift Store Projects from the Team

Three-Tier Wrought Iron Plant Stand for Fall My Repurposed Life
Easy Modern Mirror Edge Domestically Speaking
Hanging Candy Dish Petticoat Junktion
DIY Bird Feeder House of Hawthornes
Pumpkin Decor from Straw Trivets Sadie Seasongoods
How to Make A Painted Surface Look Like Wood My Uncommon Slice of Suburbia
DIY Three-Panel Room Divider Refresh Shop At Blu
Thrifted Pumpkin Basket Makeover Organized Clutter
DIY Felted Leaves Our Southern Home




I love the new modern look! What a clever idea to use weather stripping!
Perfect modern update for the mirror!
What a great idea, I never would have guessed that was the product you used, brilliant!
So cool and super easy!! I mean, can you ever have enough mirrors? Several would make a great focal point. Pinned.
Maryann
That’s really cool! I have thrown mirrors away before. I wish I had known about this hack then!
pinning!
gail